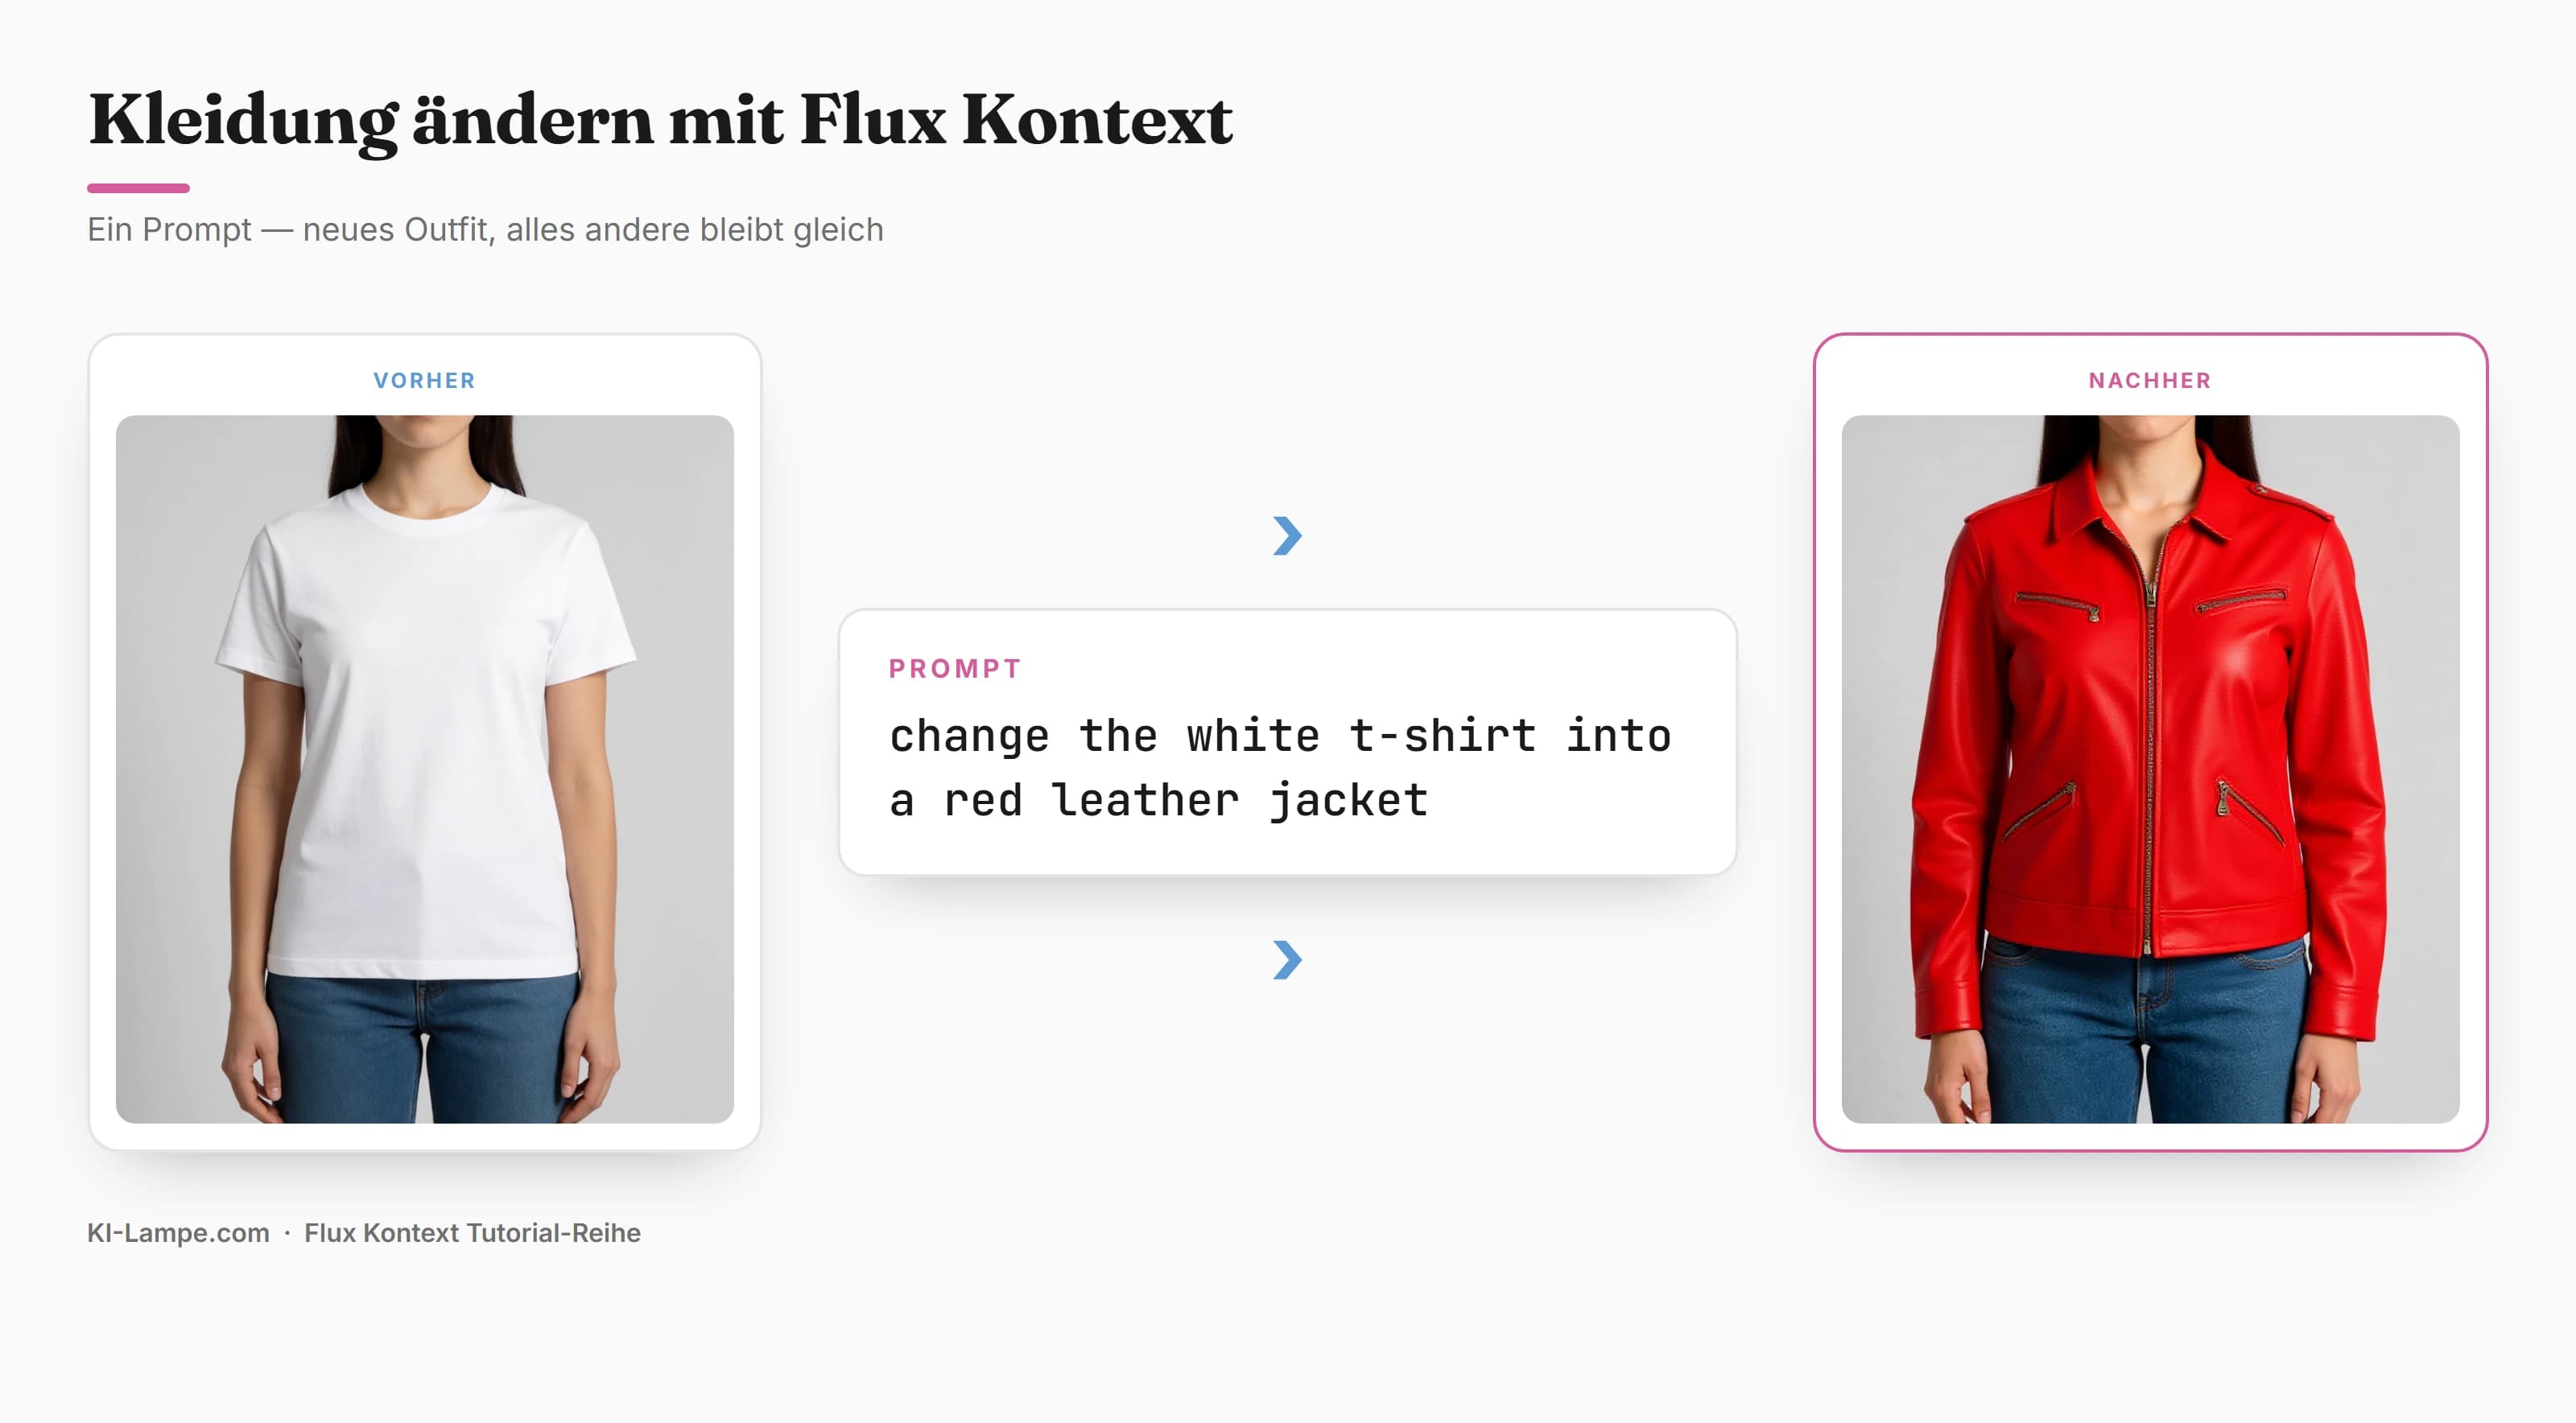
Drop a photo into ChatGPT and ask for a red leather jacket – you get a new person back. Different face, different pose, different background. Fine for a quick sketch, useless for anything else.
Flux Kontext does the opposite: it changes only what you name. The white t-shirt becomes a leather jacket – face, posture, jeans and background stay pixel-for-pixel identical. That's the whole difference between "a new image" and "editing this image".
This guide walks the complete path – tested locally on an RTX 3060 with 12 GB VRAM, entirely free, no cloud required.
As of July 2026 · ComfyUI (current) · Flux.1 Kontext Dev as GGUF · custom node "ComfyUI-GGUF"
What you'll get:
- Why Kontext preserves the subject – while ChatGPT reinvents it
- The 4 model files and exactly where they go
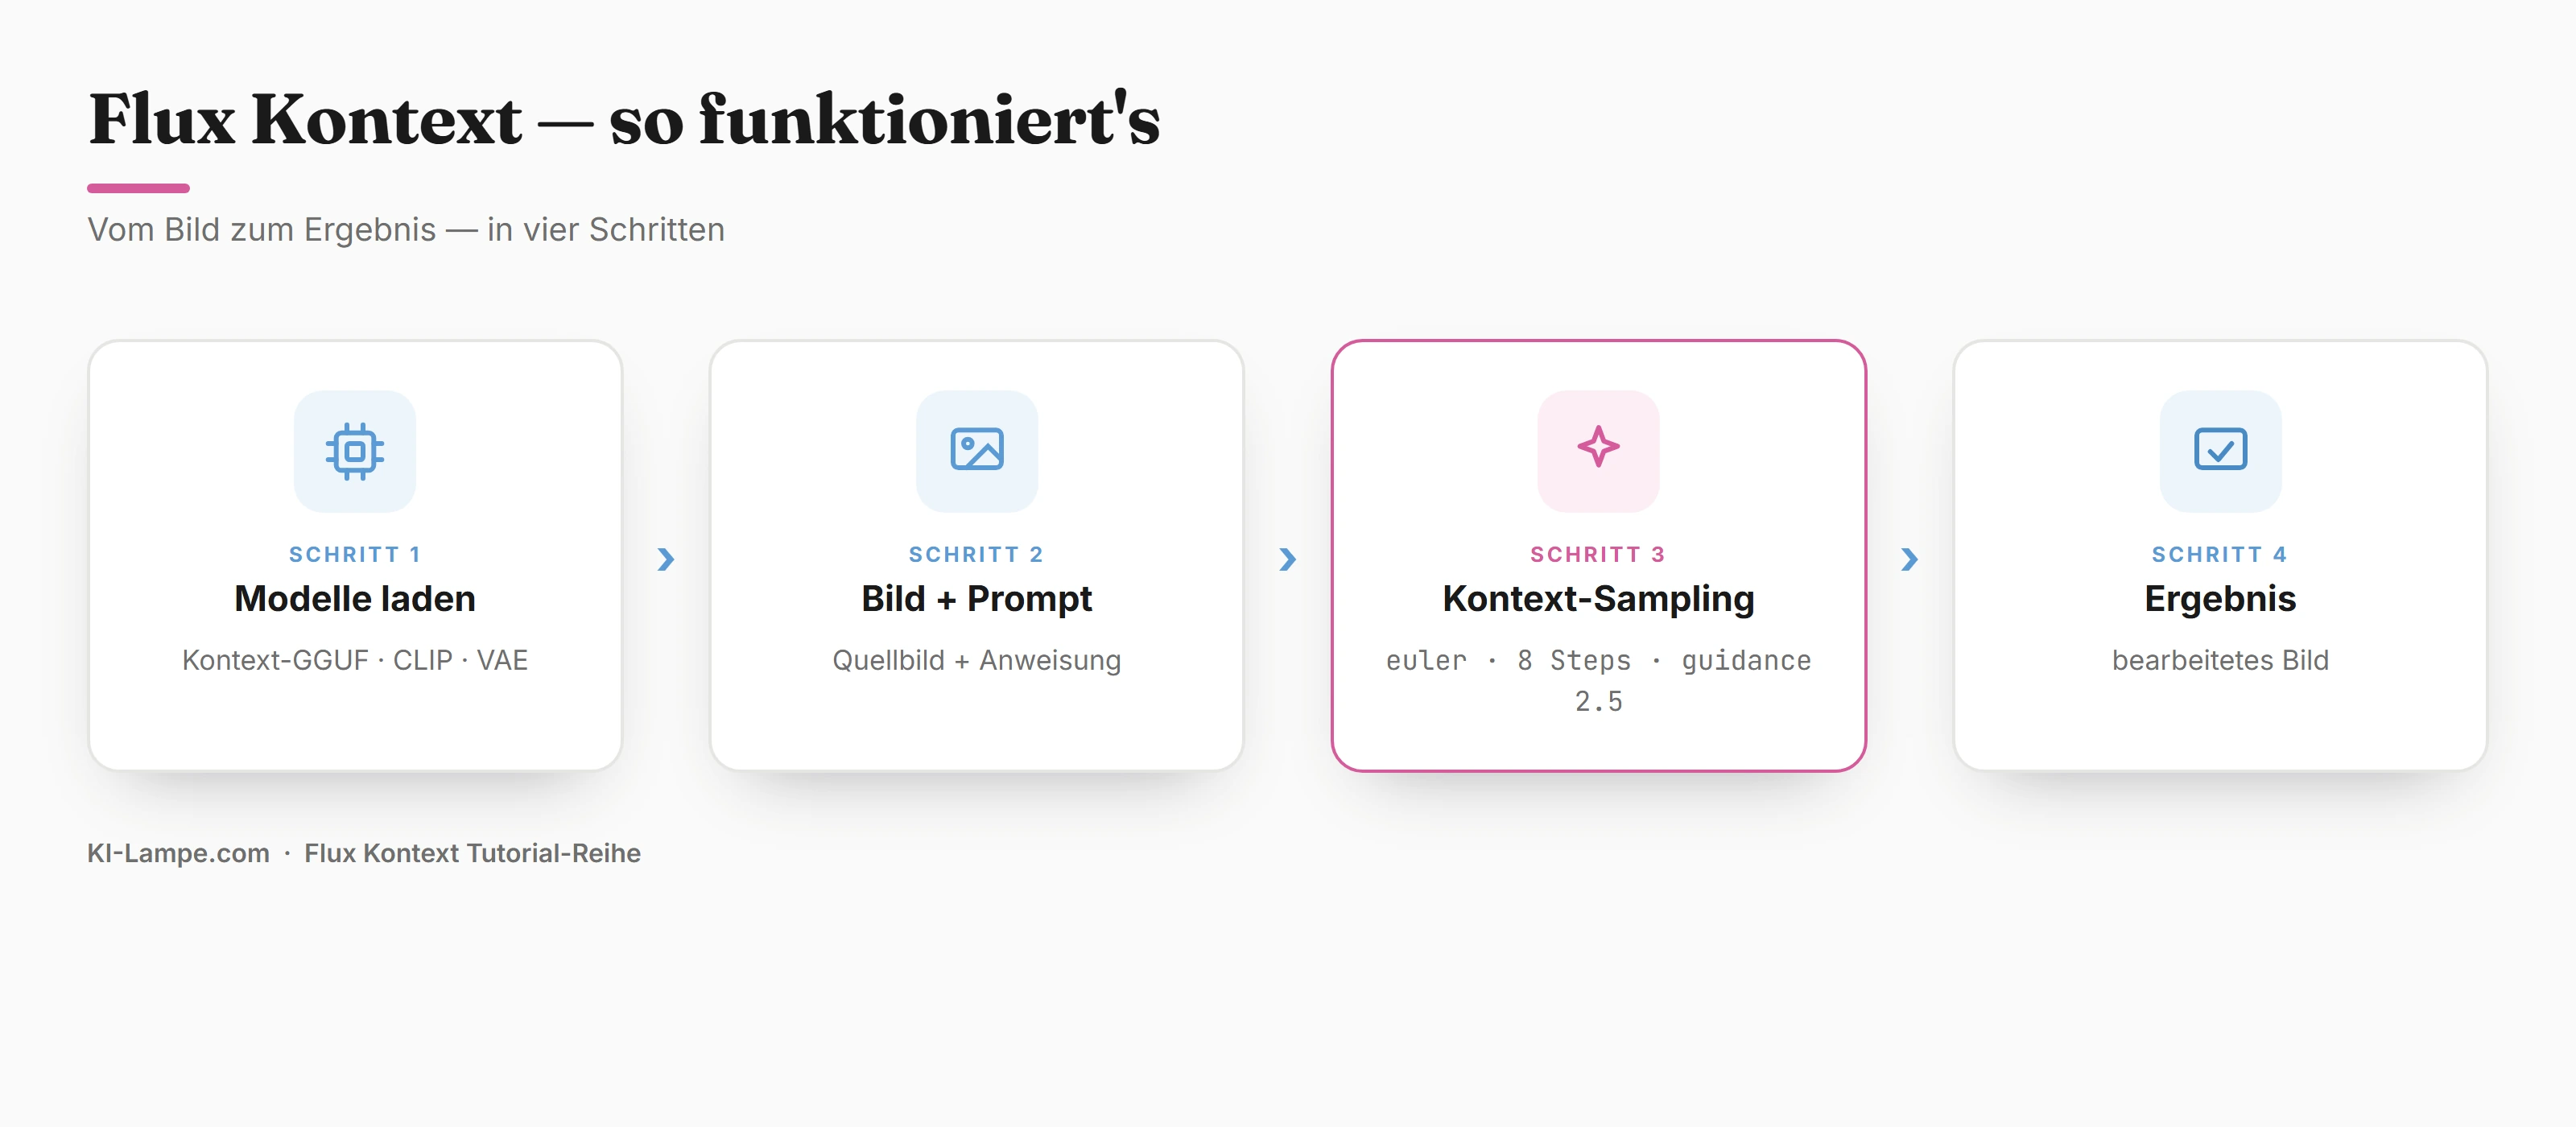
- The ComfyUI workflow in 4 steps – with the GGUF trick for 12 GB cards
- The right prompt wording for swapping clothes
- Fixes for when the outfit won't change
Kontext vs. "ChatGPT could've done that too"
The key concept is image conditioning. Kontext receives your original image not as a vague description but as a fixed reference point (the ReferenceLatent node in the workflow). The model holds everything you don't mention constant and computes only the change you name.
In practice:
- One photo, one prompt, one change – no redrawing of the person.
- Face, posture, lighting and background are preserved.
- You can edit the same image several times in sequence (first the jacket, then the hair, then the background).
That's the creative lever: not "AI paints something", but precise image direction. Product shots, character variants, model looks without a second shoot – all from one source image.
Requirements
| What | Recommendation |
|---|---|
| GPU | NVIDIA with ≥ 8 GB VRAM (tested on RTX 3060/12 GB) |
| Software | ComfyUI (current version) |
| Custom node | ComfyUI-GGUF (for the GGUF loader) |
| Storage | ~ 12 GB free for the model files |
💡 Tip: We deliberately use the GGUF variant of Flux Kontext (Q4_K_M, ~6.8 GB). GGUF is a compressed format – so a 12-billion-parameter model runs smoothly on a 12 GB card, for which the full fp16 version (~24 GB) is far too large.
⚠️ Warning: ComfyUI Desktop and the portable version do not share models. Put the files in the models folder of the version you actually launch.
 Empfohlenes Tool · Cloud-GPU
Keine starke Grafikkarte? Führe ComfyUI in der Cloud aus.
Flux & SDXL sind speicherhungrig. Statt ~1.800 € für eine eigene Karte mietest du bei RunPod eine 24-GB-GPU ab ca. 0,50 €/Stunde – und zahlst nur, was du nutzt.
Step 1: Install the "ComfyUI-GGUF" custom node
The GGUF loader isn't a stock node – it comes via the Manager:
- Launch ComfyUI → click Manager on the right.
- Open the Custom Nodes Manager → search for
ComfyUI-GGUF→ Install. - Fully restart ComfyUI.
Skip this and the "Unet Loader (GGUF)" node is missing later and the workflow stays red.
Step 2: Download the four models and place them
Flux Kontext has four building blocks: the main model, two text encoders and a VAE.
| File | Source | Folder |
|---|---|---|
flux1-kontext-dev-Q4_K_M.gguf | 🤗 HuggingFace: QuantStack/FLUX.1-Kontext-dev-GGUF | models/unet/ |
t5xxl_fp8_e4m3fn.safetensors | 🤗 comfyanonymous/flux_text_encoders | models/text_encoders/ |
clip_l.safetensors | 🤗 comfyanonymous/flux_text_encoders | models/clip/ |
ae.safetensors | 🤗 black-forest-labs/FLUX.1-schnell (VAE) | models/vae/ |
The folder structure ends up like this:
📁 ComfyUI/
└── 📁 models/
    ├── 📁 unet/
    │   └── flux1-kontext-dev-Q4_K_M.gguf
    ├── 📁 text_encoders/
    │   └── t5xxl_fp8_e4m3fn.safetensors
    ├── 📁 clip/
    │   └── clip_l.safetensors
    └── 📁 vae/
        └── ae.safetensors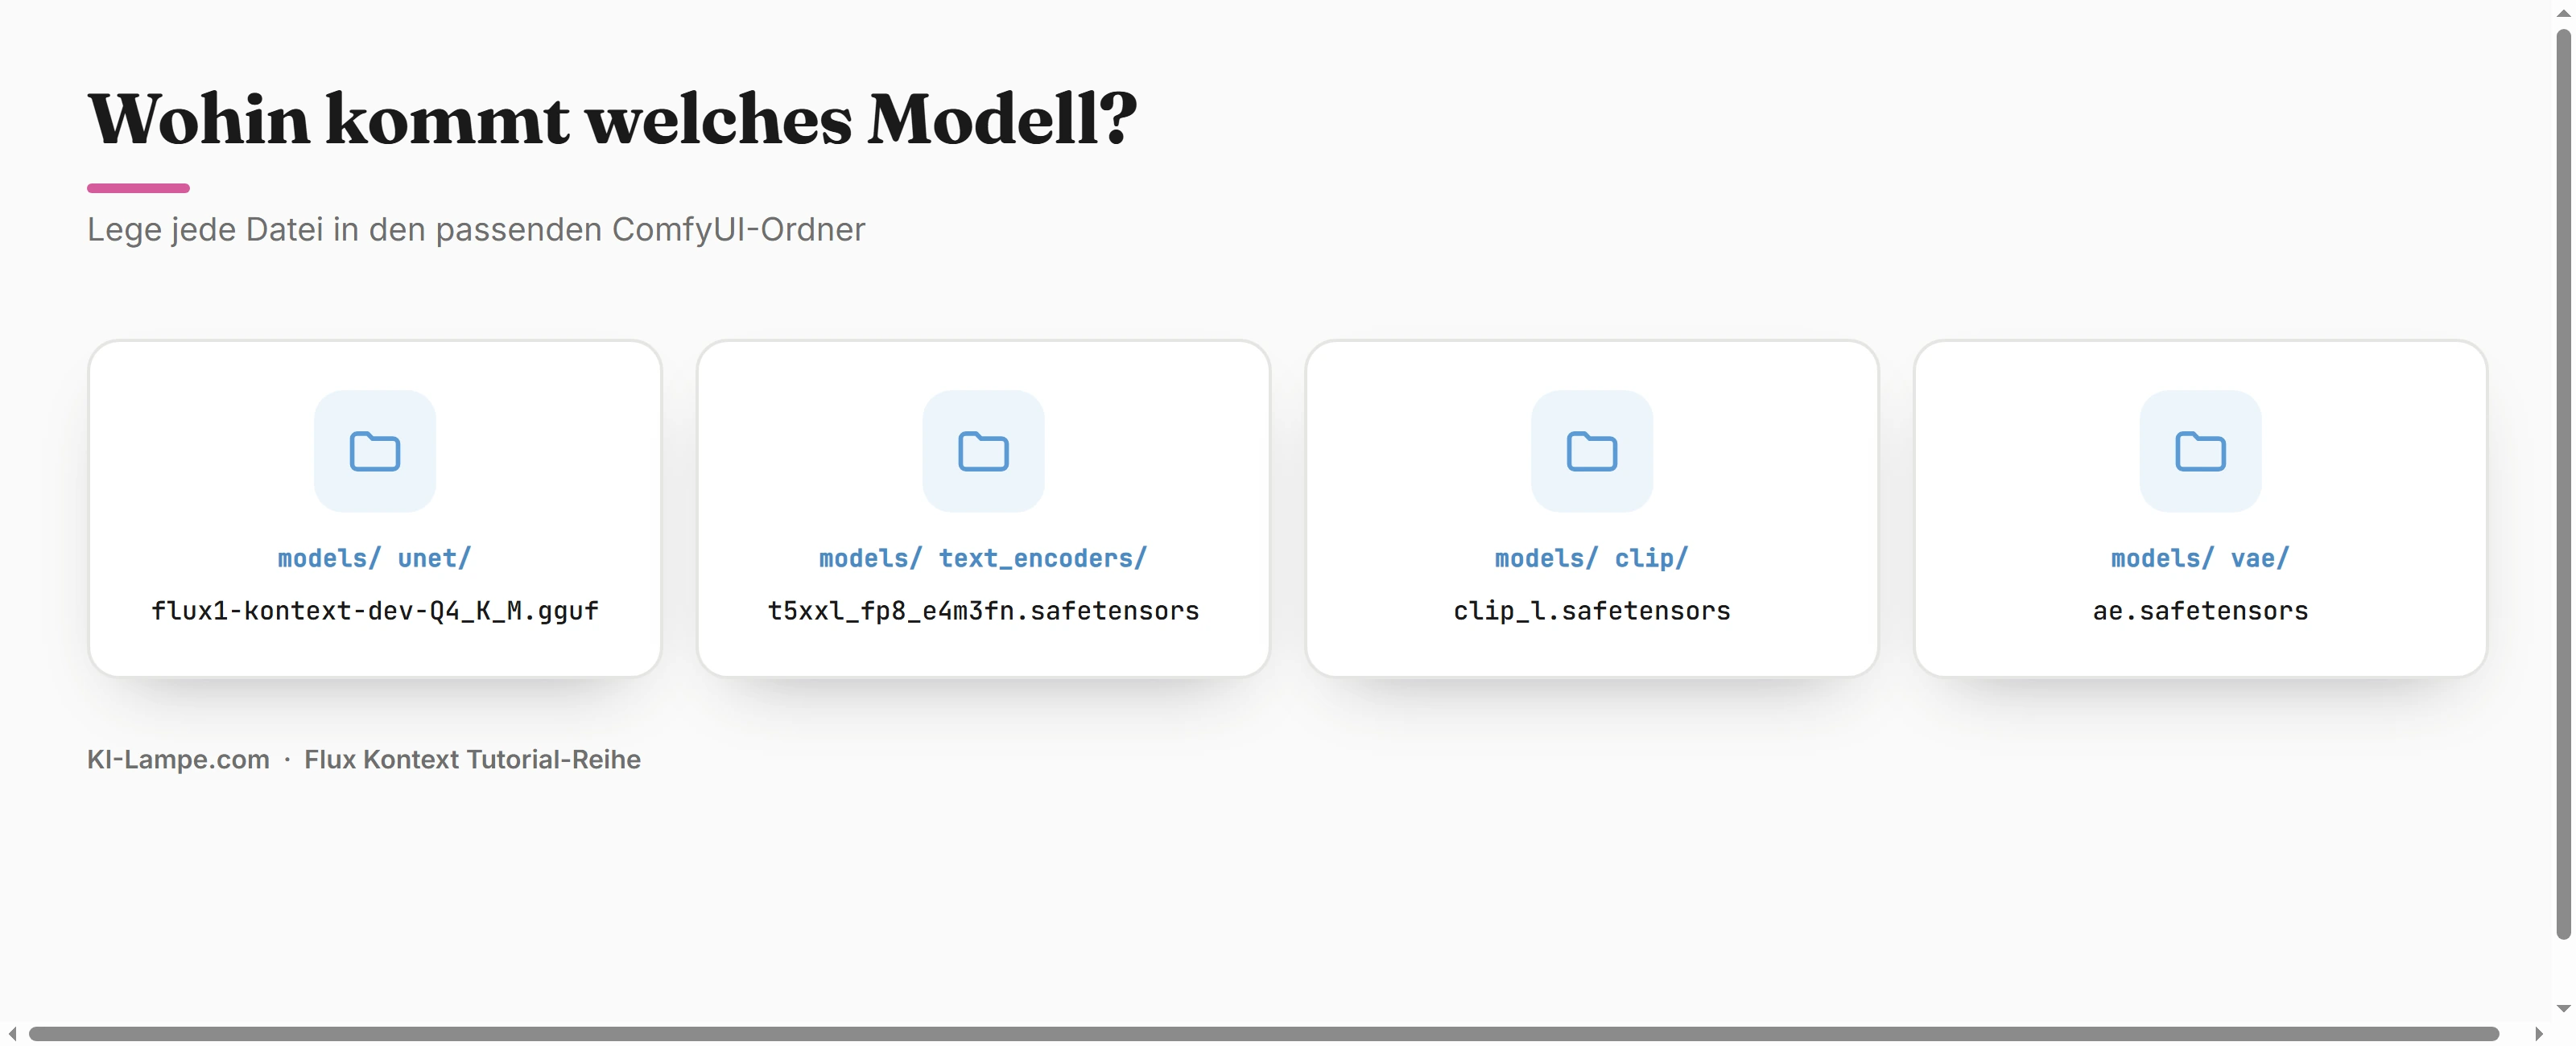
📌 Note: After copying, restart ComfyUI once, otherwise the models won't appear in the dropdowns.
Step 3: Load the Kontext workflow – with the GGUF trick
You build nothing by hand. ComfyUI ships the workflow as a template:
- Click Workflow → Browse Templates at the top.
- Pick category Flux → "Flux.1 Kontext Dev (Basic)". The full graph loads automatically.
- Now the one important move for 12 GB cards: delete the "Load Diffusion Model" node. Right-click the canvas → Add Node → bootleg → Unet Loader (GGUF) → select
flux1-kontext-dev-Q4_K_M.gguf→ reconnect the MODEL output to the KSampler.
Quickly check that the remaining loaders are correct:
- DualCLIPLoader →
t5xxl_fp8_e4m3fn+clip_l,type: flux - VAELoader →
ae.safetensors
🔑 Key point: The stock template loads the full model via "Load Diffusion Model". That single node is swapped for Unet Loader (GGUF) – the rest of the workflow stays identical.
Step 4: Load the image, write the prompt, generate
1. Load the image. Upload your source photo in the Load Image node.
2. Write the prompt. Enter the change in the positive prompt – English works most reliably with Flux:
change the white t-shirt into a red leather jacket3. Set the parameters. The tested values for Kontext:
| Parameter | Value | Why |
|---|---|---|
| Sampler | euler | stable for Flux |
| Scheduler | simple | default for Kontext |
| Steps | 8 | fast & tested; 20 for maximum detail |
| Guidance | 2.5 | Kontext default – higher = more literal |
| CFG | 1.0 | fixed for Flux |
4. Generate. Click Queue Prompt.
🧪 Try it: The first run takes ~2 minutes because the model loads into VRAM. Every further edit lands at ~30–60 seconds on the RTX 3060.
Result: the t-shirt is now a red leather jacket – face, pose, jeans and background unchanged.
The right wording: how to swap clothes cleanly
Kontext is precise when you are. Three rules:
- Name the garment + material + color. "a red leather jacket" beats "nice jacket" by a mile.
- One change per run. To change the jacket and the pants, do two runs – each step stays controlled.
- Pin it explicitly on drift: if the model clings to the subject, add
keep the same face, pose and background.
A few proven patterns:
| Goal | Prompt |
|---|---|
| Swap the top | change the white t-shirt into a red leather jacket |
| Full look | replace the outfit with an elegant black evening dress |
| Recolor a piece | change the jacket color from red to navy blue |
| Add a style | turn the hoodie into a denim jacket, keep the same pose |
Outfit won't change? Quick fixes
| Problem | Cause | Fix |
|---|---|---|
| Models not in dropdown | ComfyUI not restarted | Restart ComfyUI |
| "Unet Loader (GGUF)" node missing | ComfyUI-GGUF not installed | Manager → install ComfyUI-GGUF |
| Barely visible change | Guidance too low | Raise Guidance to 3.0–3.5 |
| Face/person changes | Prompt too open | Add keep the same face and background |
| Red nodes / errors | File in the wrong folder | Check folders against the table above |
No 12 GB card? Use the cloud
If your GPU can't keep up or lacks VRAM: run the same workflow on a cloud GPU – an RTX 4090 (24 GB) from ~$0.59/h renders Kontext in seconds and with no quant compromise. The full setup is in our hub:
👉 Set up ComfyUI on RunPod (Network Volume)
Empfohlenes Tool · Cloud-GPUKeine starke Grafikkarte? Führe ComfyUI in der Cloud aus.
Flux & SDXL sind speicherhungrig. Statt ~1.800 € für eine eigene Karte mietest du bei RunPod eine 24-GB-GPU ab ca. 0,50 €/Stunde – und zahlst nur, was du nutzt.
Conclusion & next steps
Flux Kontext isn't image generation, it's image direction: you keep your subject and swap individual elements on purpose. Changing clothes is the easiest entry point – the same technique carries hairstyles, backgrounds and product variants.
- 📥 Download: The finished workflow JSON is at the end of the article – created in ComfyUI via Workflow → Export, ready to run.
- 🔗 Missing the basics? → Install Flux.1 Dev with ComfyUI
- ⏭️ Next in the series: "Flux Kontext: change hairstyle" and "Flux Kontext: swap the background".
One photo, one sentence, a new outfit – and everything else stays exactly as it was.